Top Tips for Painting Your RV
4 min read
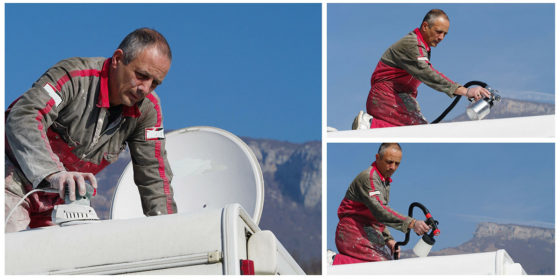
If you have owned your RV for a while, you may have noticed your RV isn’t quite as vibrant as it was when you first purchased it. Exposure to natural elements and regular wear-and-tear may have caused the paint to chip or fade. Perhaps it is time for a fresh coat. Painting your Class C motorhome, fifth wheel, travel trailer or other RV can be a great way to refresh its appearance, protect the exterior, or even personalize it to your liking. RVT has provided a few top tips to consider when painting your RV.
Proper Preparation
Before you start painting, thorough preparation is crucial. Since some paints are difficult to remove, you need to make sure every painting surface is prepared. If you are painting the exterior of your RV, first you need to clean the exterior surface of the RV to remove dirt, grime, and any old paint that may be peeling or flaking. Use a mild detergent and a soft brush or sponge to scrub the surface. Rinse thoroughly and allow the RV to dry completely before proceeding. To effectively paint the interior, create as much space as possible and remove any appliances or furniture that could impede your painting process.
Surface Repair
Inspect the exterior for any dents, scratches, or damaged areas. Repair them using appropriate methods, such as filling in dents with body filler, sanding down rough spots, and replacing any damaged panels or trim. Ensuring a smooth and even surface will result in a better paint finish.
Choose the Right Paint
What you are painting will dictate the correct paint. When painting your RV’s exterior, be sure to select a high-quality paint specifically formulated for the type of surface you’re painting. There are paints designed for fiberglass, aluminum, and other materials commonly found in RV exteriors. Other factors are important to consider when choosing a paint as well, including durability, UV resistance, and ease of application. When painting your RV’s interior, you can use water-based (latex) paint as you would for the interior of a house.
Test Colors and Finishes
Before committing to a specific color or finish, test it on a small, inconspicuous area of your RV. This will allow you to see how the paint looks in different lighting conditions and determine if it’s the desired shade and finish. Typically, white or off-white, and soft colors are ideal for interior settings, as these colors tend to make a space feel more open compared to dark or vibrant colors.
Proper Ventilation
When painting your RV, make sure you are working in a well-ventilated area. If you are using a spray gun or aerosol paint, wear a respirator or face covering to protect yourself from fumes and particles. Consider weather conditions as well, as high humidity or extreme temperatures can affect the paint application and drying process.
Proper Tools and Technique
Just prior to painting, use painters tape to protect any areas you do not want to be painted, including windows, trim, or decals. Depending on the size and complexity of the project, you will need to use a variety of painting tools, including a brush, roller, or spray gun. Follow the manufacturer’s instructions for the chosen paint and apply it evenly, using long, smooth strokes. Since an RV tends to have less wall space than a normal house, it is important to use a cut-in brush to paint all interior edges. When cutting in, be patient and meticulous, particularly in areas that have many nooks and crannies. Afterward, carefully use a roller brush for walls with more surface area.
Multiple Coats and Drying Time
When painting your RV, it is important to apply multiple thin coats of paint. Start with a primer, then use your desired color. This will ensure better adhesion and a smoother finish. Allow each coat to dry thoroughly before applying the next, following the recommended drying time provided by the paint manufacturer. When painting your RV’s exterior, be mindful of the forecast – it will be detrimental if inclement weather interrupts your painting process. If possible, store your RV inside or under a carport as the paint dries.
Additionally, consider applying a clear coat over the paint to provide an extra layer of protection and enhance the glossy finish. Clear coats can also help with UV resistance and prevent the paint from fading over time.
Once the paint job is complete, maintain your RV’s appearance by regularly washing and waxing the exterior. This will help preserve the paint and protect it from environmental elements.
Interested in further renovations, or flipping your used RV? Check out 8 Quick Tips for Renovating an Old RV and Top Tips for Flipping a Used RV for Resale.
If renovating isn’t up your alley and you’d rather buy a new or used RV, check out RVT.com for the latest listings.
By Alex Hoyes


